Friday, October 2, 2009

Adding frame/border to picture using Picasa 3.0

There is a tricky way to add border to the picture using Picasa 3.0’s Collage feature. Here is the step by step way

1. Select picture and click on Collage option.

Figure 1 

2. Select Mosaic option

Figure 2

3. Select properties as per requirements

Figure 3

Figure 4

4. That’s it now Create Collage

Figure 5

Here is the Result  Created Collage

Friday, September 4, 2009

How to Install JAD file Offline to Blackberry

     This post explains how to install Jad file to Blackberry without OTN link, for example i took theme. This will be useful whenever you don’t have internet services available on your blackberry. Just download jad file from internet to your computer and transfer it to your phone. Follow these steps to install it manually.

1. Go to Media application in your phone

DSC00345

2.Select Option>>Explore.

DSC00346

3. You will see file explorer with phone as well as external memory  DSC00347

4. locate transferred file , you can search for jad files. 4.Select the jad file and open it as like normal file.DSC00348

6. It gets open in application downloader and you will get download option.

DSC00349

7. Just select download option and downloader does it work.DSC00350

8. At the end you will get confirmation about successful download.

DSC00351

DSC00352 

9. You can confirm whether it is installed or not. In this example i have installed theme so you will see new theme under Option>>Themes

DSC00353

DSC00354 


Thursday, July 30, 2009

How to crop movie using Windows Movie Maker

   Windows Movie Maker provides easy and convenient way to cropping any video. Here the tutorial

Cropping Video Clip

Wednesday, July 29, 2009

How to do bulk resize operation using Picasa

Many times you need to resize a picture or no of pictures in day to day life. Resizing a single is not a big problem, if there is need of resizing multiple pictures then its going to be big pain.

Picasa has come up with a very easy and convenient option of doing the same job. It is a simple two-three steps process as shown below

1. Select the pictures and select “Export” option

2009-07-28_2223

2. You will get options to select size and target destination

2009-07-29_2246

Thats it you are done with resizing operation.

Saturday, June 27, 2009

How to Cut mp3 files without using any third party tools in Windows XP/Vista

     There are many tools available to cut mp3 files, but most of them are either not free or not standard. There is a simple and easy way of doing this in Windows XP/Vista. Most of time XP/Vista comes with Windows Movie Maker software. If you don’t have this software then we can download this from http://www.microsoft.com/windowsxp/downloads/updates/moviemaker2.mspx.

You can cut any mp3/audio file using these few steps

1. Import mp3/audio file to Windows Movie Player using Audio/Music import option. You will see this option on left side menu as shown below

Audio Import

2. Drag and drop imported audio file to Audio Timeline.

2009-06-28_1035.png

3.You will find “Split” option on right bottom, it splits selected file into two parts from present selected location.

2009-06-28_1038.png

4.Now suppose you have to cut part of the 00:15 to 00:25 seconds. First select 00:25 second time line and split it into two using “Split” option. And then Select 00:15 and repeat same steps.

Fullscreen capture 6272009 40618 PM.bmp

Fullscreen capture 6272009 40659 PM.bmp5. Now delete unwanted front and end part. Select “Publish” option to save this cut clip.

2009-06-28_1058

Sunday, June 14, 2009

How to mail Pictures in just few Clicks

Picasa 3.0 is Google's very famous, simple and powerful picture editing desktop tool. It has many simple but very useful features. These feature makes our life very easy. Many time we mail pictures to our near and dear, but it is very pailful job as we need to attach it one by one , wait till it get attached and sent. Some time we need to reduce size of the images before sending it.
Picasa 3.0 makes your life very easy, it has a "Mail" feature which is integrated with your GMail account.
2009-06-28_1108.png
Above Image showes "Mail" option at bottom toolbar of picasa. Now mailing pictures is just four click process

1. Select Pics to be mailed.

2. Click on "Mail" option as shown in above image.
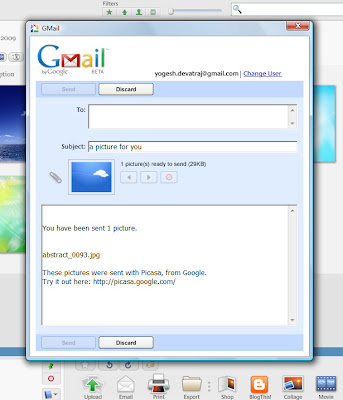
3. You will get mail composer editor with all selected images attached. As shown following figure.


4. Select contacts from your gmail account and Send it, thats it.


Picasa gives option of selecting image size. Select Tools>>Options and then select "E-Mail" tab. There you will get Output Setting as shown below
2009-06-28_1111.png
 
Here you can set size of the images. This tool will re-size images before mailing it. There are also other options such as "when sending single image".
This feature really make our work more easy, start using it.


Sunday, April 5, 2009

How to Use Screen Capture feature of Picasa

Google ha released Picasa 3.0 recently. Many interesting features have been introduced such as face tagging, more Collage templates, blogging, online shop integration etc 
One interesting feature is Screen Capture. Keep Picasa running in background, just open it and minimize it. When you press "Print Screen" key on keyboard, current desktop will get captured.
You will see, this captured image under Projects section "Screen Captured"  album. You can easily locate these images on local file style.


This is how you can make your job easy without installing any special screen capture.

Thursday, April 2, 2009

Simplest Way to Try Ubuntu [ Linux ]


Installing Ubuntu [ Linux ] has never been so easy and straight forward. Many people don't want to try Ubuntu because they think it is very complicated , very difficult to install, it will mess up whole hard disk partition and so no. Out of all these problem , first and most difficult problem is "Installing it".

There are many people those want to try Ubuntu but don't want to shift over completely at first time. They wanted to feel it and move over it slowly. For such people , there is a very easy and straight forward way .

Ubuntu 8.1 has introduced Wubi installer for windows, using this you can install ubuntu as a simple Application in windows. It is only 2-3 steps process.

1.  Download Wubi installer [ here ] or get Ubuntu 8.1 installer CD

2. Run installer , select "Install inside Windows" option


3. Select any drive which has free space , specify installation size, user name and password. That's it , you are done with installation process. 


Sit back and let it install. It takes care of making virtual partition, formatting it, installing OS, making entry in all available OS on your machine. After this installation process completion , just restart you machine. You will see dual boot option in starting , one for Windows and another for Ubuntu.  Now you can use both OS using dual boot option.

Un-installing ubuntu is mush easier than installing, just go to Add/Remove program in windows and uninstall Ubuntu application, that's it.


Wednesday, April 1, 2009

How to rip/cut Songs/Scenes into divx from DVD

Here is the simple solution to rip/cut selected songs or scenes from a DVD. You need two  software tools to do this .
  1. DVD Shrink 3.2
  2. DivX Convertor 
DVD shrink is open source software to shrink/cut/backup media content Here are the steps to  do this 
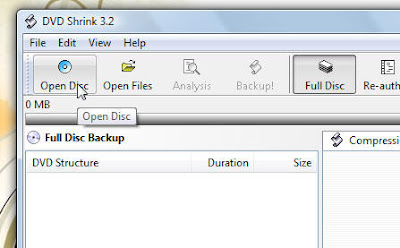
  1. Open Dics in DVD Shrink 

2. Select Re-author option to change mode from Full Disc to ripping mode


3. Drag and drop corresponding Title from DVD Browser section to compilation section at left side

  4. Now select that Title and click on Start/End Frame option 


5. Now you will see one small windows , where you can set starting and ending point.

6.  After selecting start/end point and clicking on OK, click  Backup option on top. You get option to save ripped clip.

7.  This ripped clip will be in VOB format , now you can convert it in to divx/avi using DivX converter.

So in simple 7 steps you can rip scenes from DVD.